Explore JSON Demo using AJAX
In this session, we are going to load an external JSON file using Ajax. We will dissect an Ajax request and log the response in the console. Today’s all modern browsers have Ajax support which allows access to any services and API. So with that, we can interact with these services Asynchronously without reloading the entire page. This technology is called Asynchronous JavaScript and XML.
Today, however, JSON data is preferred more over XML data. Ajax can update a part of your page dynamically without reloading the entire page. The heart of Ajax technology is the XML HTTP request object which is built into all modern browsers. Now to use the XML HTTP request object, first create an instance of it using any variable name that we want. In this case, say xhr and the next we need to prepare the parameter for which we want to operate.
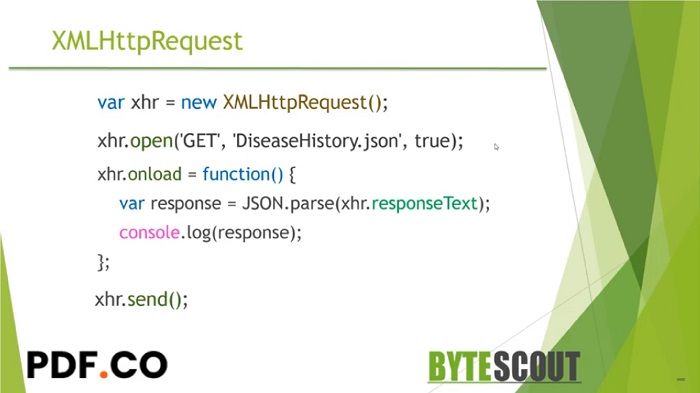
We need to use the open method of the XML HTTP request. There are three parameters in this method: first, we need a method for retrieving the information. We will use ‘GET’ over here and then we need to set a path where our JSON file resided. Then the Boolean parameter indicates whether or not you want to execute the request asynchronously. This should be true in our case.
Next we use the send method which executes the entire process. Between these, we create a function that waits for the data to load successfully. Once we get the data then we convert it from a string to an object and put that response object into a custom variable. If everything works, I will preview the JSON object in the JavaScript console. Now let's see this in the practical sense.
Here I have already created one JSON file named diseasehistory.JSON which contains the patient demographic information like ID, Patient Name, Gender, and his or her disease history in the Array. I have one index.html file and we are going to load this JSON file into this HTML page using the XML HTTP request or Ajax.
First declare the XML HTTP request object equal to the new XML HTTP request. Now provide the required parameter to the open method to invoke our request. The first parameter indicates how you are going to get the information. Here you can use GET, Post, Boot, etc. The second parameter is the path to our JSON file. We need to write our JSON file name and then the last parameter is whether to execute this request asynchronously or not.
In our case, it should be true, and then when the request is successful and data is ready to load we want to call the on-load method. Define the function we will get our Ajax response in response text. We need to parse this string as a JSON object using JSON.parse method. Now write JSON.parse(xhr.responseText); and assign this generated response in one variable. Then I want to see it in the browser console, for that use console.log(response); function.
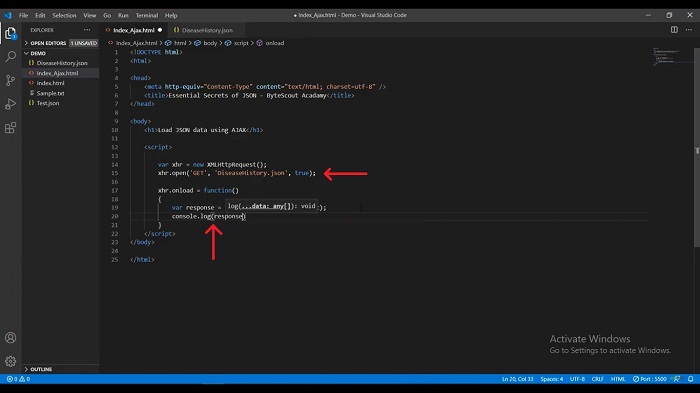
It's time to execute this entire process, for that I need to use the send function. We are done with the code and run this page in the browser. To run this page I have already configured an open live server. Click on ‘Open with Live Server’ and run this page in the browser. As you can see here that we are now able to see the disease history.JSON object into the browser console.
If we expand this patient array then we can see the patient 1 and patient 2 objects. If I expand the patient 1 object further then we can see the disease history. As we have already learned in the previous session that if you want to access this particular value then you can access it using dot annotation. In the tooltip, I can access this particular information. Write down the same in this console.log(response.Patients[0].DiseaseHistory[0].ConsultTo); now when I save this code the page on the right-hand side gets automatically refreshed. We will get the expected data that we want.

This is how you can get the JSON data using Ajax request and you can manipulate the JSON object. What happens if I intentionally rename this JSON file which does not exist in our project directory. If I save this project then you can here see that we will get a “404 page not found” error. To get rid of this error we need to check the status.
In Ajax requests you will get a different response status if the response status is 200 which means ‘OK’ and our response gets successfully loaded without any error. If you get 403 it means our request gets forbidden and 404 means resource not found. Let's move to our example, now check the error status in one if condition when I save this code the page gets refreshed and you can see our console error message.
By the way, you can ignore this error. Now if I add the correct JSON name over here and save the code then the error disappears and you will get the expected data. This is how you can handle the exception by checking the request status.
Other useful articles:
- Essential Secrets of JSON - Introduction to JSON
- JSON Components and Specifications
- Real-World Example of JSON Usage with PDF.co Cloud API
- Why Should I Use JSON Format
- JSON vs XML
- How to Structure JSON – Demo Overview
- How to Beautify JSON
- How to Explore JSON
- Explore JSON Demo using AJAX
- Real-World Example of JSON Usage with PDF.co Cloud API
- Common Mistakes and Gotcha Part 2
- JSON vs CSV vs XML
- Getting Started with JSON Schema
- JavaScript vs JSON
- JSON vs BSON vs GSON
- JSON vs YAML vs TOML